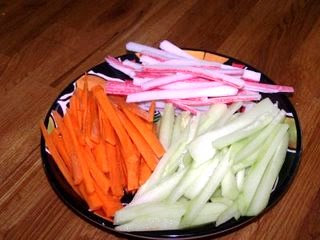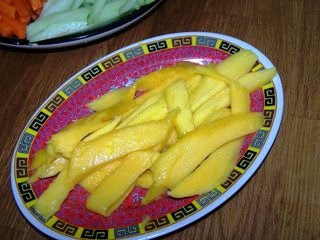


I made up the rest of the sushi stuff today. I grabbed my camera this time and decided to show you the steps needed to perfect rolls. You decide what you would like in them. It doesn't need to be raw fish or veggies even. I had stuff in my fridge to do some mango rolls and some Californian rolls. First, I grabbed my handy microwave rice steamer and threw in 3 cups rice and 3 3/4 cups water into it. Put the rice steamer in micro on HIGH for 5 minutes. As soon as I heard the beep, left the door to micro closed and switched the temp to MEDIUM and put it on for 15 minutes.
While the rice is cooking away, I had plenty of time to juliene some carrots, cucumbers (seeded), imitation crab meat, some mango, and avacado for the rolls. I do the avacado last, as it likes to turn brown on you. When the rice is done, open it right away and start cooling it down. You have to use a wooden FLAT spoon and don't STIR it. You need to use the folding method when working with sticky rice. You will have a ball of mush if you stir it too much.
Grab yourself a piece of toasted nori (seaweed). Make sure the flatter (shiny) side is down. You will need the corrugated (non shiny) side up.
For California rolls:
Place rice all over the nori, lightly pushing on it to pack it down some. Make sure you leave a 1/2 inch side (away from you) where you do not put any rice. This helps the rolling process later. Put your goodies in the middle of the rice section. Pile it on and don't be shy. Try something that you haven't tried before. It may like a weird combo, but may be delicious. Move the nori to the edge of the rolling mat closest to you and hold the nori corner along with your mat. Move the side closest to you to the edge of the rice (leaving that 1/2 inch edge of naked nori). Press down with both hands to press the sushi together. I usually press my sushi rolls into a square shape with the mat. Slightly lift up the mat to see if all is going OK. You will need to roll your roll over on itself for the second press. This will bring the naked nori in contact with the filled roll. The naked nori will stick to the roll when you do the second press down.Lift up your mat the second time and you'll see the finished product. Sometimes the insides like to slide out the roll. That's just a little treat to snack on while you work. The best way to cut this big roll is with a serrated knife (THAT HAS BEEN WETTENED WITH WATER). I usually cut my rolls near the sink. Leave the water on a trickle and run the knife under the water in between each cut. First, cut the whole in half and those halves in half, and again until you get 8 pieces of equal length. Sometimes I cut 2 pieces at once to speed up the process. The end pieces tend to be a little less solid. You can plate these with the rest (uneven side up) or taste them to see if you are on track (plating only the others).
For the mango (1 ingredient) rolls, cut a 1/4 off the piece of nori. Cut along the long side (just shorten the roll process). Put the rice on the nori like before, mango goes in the middle, and roll as you would a larger (thicker) roll. The rolls will be a little smaller, but they are good. Plate them up with the California rolls and you can call the mango rolls 'dessert' like me.
No comments:
Post a Comment